-
Notifications
You must be signed in to change notification settings - Fork 90
2. Software Install
If the images on this page fail to load, you can download a PDF of this page here.
Software needs to be installed on the Raspberry Pi Zero 2 and on the Raspberry Pi Pico W.
Note: You can run the software on the Pi Zero, but the Pi Zero 2 is recommended due to the CPU load of Command and Control. Note: You can run the Payload software on the Pico, but the Pico W is recommended as future features will make use the WiFi capability.
There are two ways to get the CubeSatSim software for your Pi.
One option is to download the disk image file and write it to a 16GB or larger micro SD card. The image is based on Raspberry Pi OS (Rasbian) Lite, Bullseye (Legacy) version dated December 2023.
All the software is installed, you just need to login to change your password and set your amateur radio callsign if you have one. You can run the update script to update all packages and update and compile the latest CubeSatSim software.
The other option is to start with a Bullseye Raspberry Pi OS (Rasbian) image and run the installation script install which will install and compile all the related software.
Here is a video showing how to install the software, although it shows the v1.2 software, the steps are the same except you will need to use the v2.0 image as the instructions show below: https://youtu.be/swWasXBH7PU
The BOM has a sheet "By Steps" which lists the parts needed for each step in order. http://cubesatsim.org/bom If you have a Google account, you can make a copy of this spreadsheet ("File" then "Make a Copy") and check off each part as you install it.
For example, here is the checklist for this step:

You can write a pre-built Raspberry Pi disk image to your SD card. Your Pi then should boot up immediately and run the CubeSatSim software. You can configure a few settings, but it will run right away.
Here are the steps we use to create the Raspberry image, so you can create your own if you want.
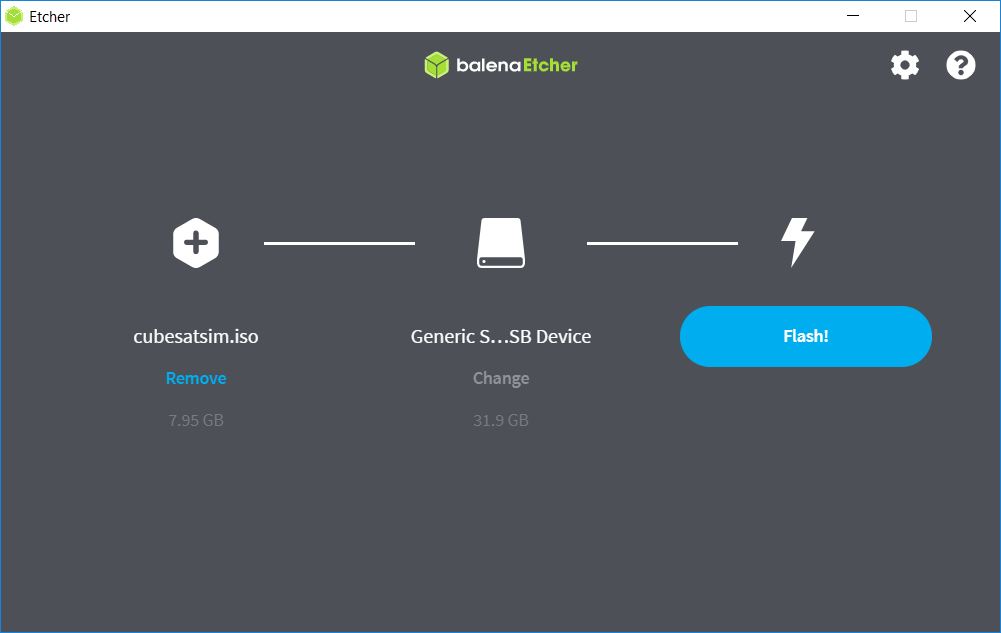
You will need a micro SD card with at least 16GB of capacity and a micro SD card writer and free software such as balenaEtcher: https://www.balena.io/etcher/ You will need to have administrator privileges on your computer in order to do this.
The image file is larger than 1GB, but with balenaEtcher you can write it from the URL without having to download it first. When you run balenaEtcher, select the Flash from URL option with this URL: http://cubesatsim.org/download/cubesatsim.iso.zip Here is the readme file for the image: http://cubesatsim.org/download/cubesatsim-readme.pdf Insert your micro SD card - the card will be erased in the process of writing. Click on Select Target and select your SD card writer. The Size shown here should match the size of your micro SD card.
Then select Flash to begin writing. You will need to input your administrator password, then the write will begin. It will take a while.
Alternatively, you can first download the disk image by opening http://cubesatsim.org/download/cubesatsim.iso.zip in your web browser, then choose the Flash from File option in balenaEtcher then select the image file you downloaded.
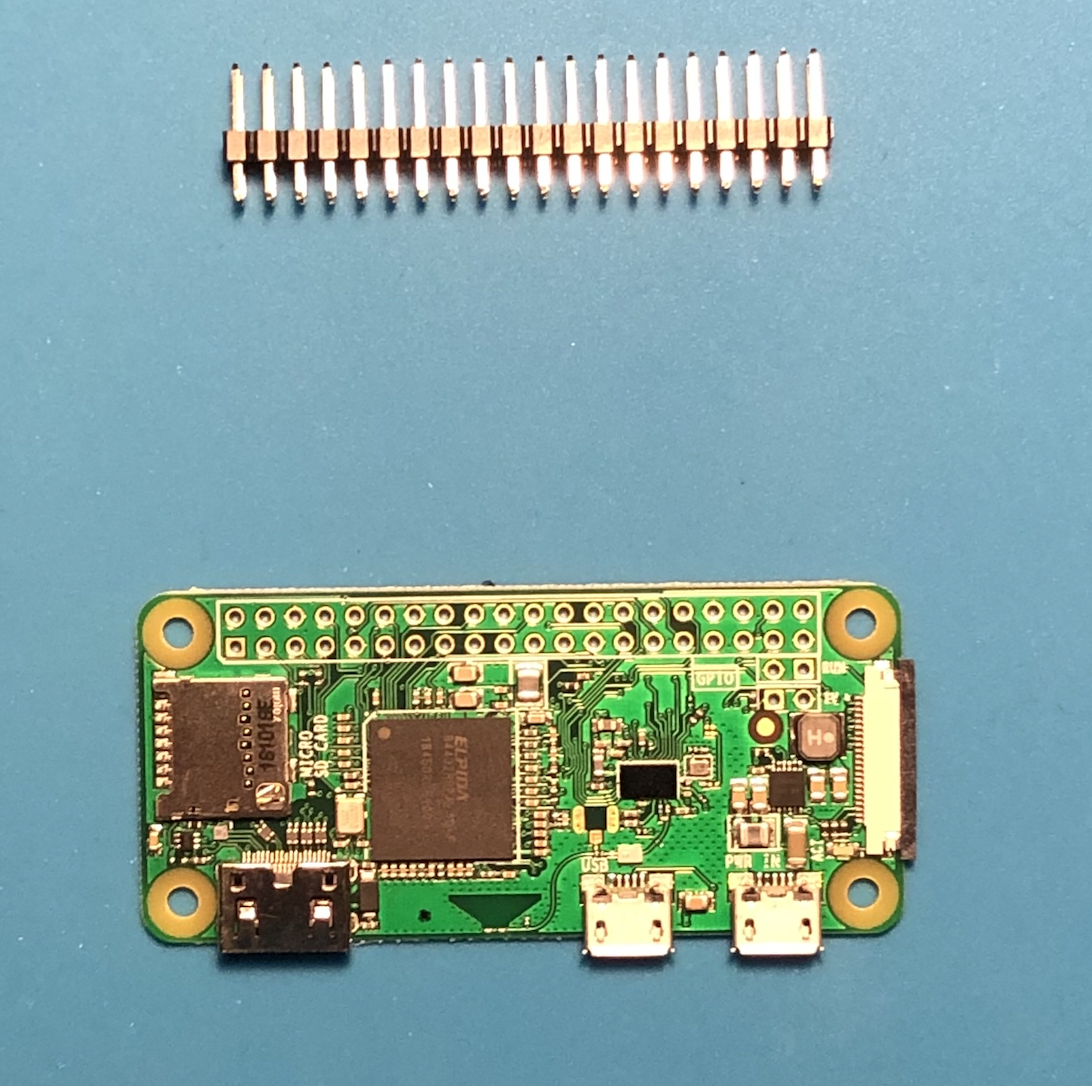
If your Raspberry Pi Zero 2 does not have the GPIO header pins installed, you will need to solder them in:
You can then insert the micro SD card in your Pi Zero 2:

If you don't have your Main board, you can still test the software by plugging a micro USB cable into either micro USB connector on the Pi Zero 2. Without the Mainboard, it will only transmit the callsign in CW (Morse Code) once at the start. If you have a radio or ground station set up, you will hear it transmit at 434.9 MHz.
To fully test the software, plug your Pi Zero 2 into the Main board then plug the USB-C cable into the Main board. If you have your Main board built up to Step 1, you can plug the Pi Zero 2 into the bottom of the GPIO header.


The red LED will immediately illuminate. After 30 seconds, the green LED will also illuminate. You will also see the tiny green LED on the Pi Zero 2 blink occasionally:

Then, the blue transmit LED will turn on.

You can customize your software by logging into the Pi. If you have an HDMI monitor (and mini HDMI adapter or cable) and a USB keyboard (and micro USB to USB adapter or OTG cable), you can access the console directly.
You will need to connect your Pi Zero 2 to your Wi-Fi so it can update the code from GitHub.
To get it on your Wi-Fi, follow these steps. First type this command:
sudo raspi-config
Then select System Options by hitting Return, then select Wireless LAN by hitting Return again. Then put your Wi-Fi name in the SSID field then hit Return, then type the Wi-Fi password then Return again. Hit the Tab key twice until Finish is highlighted, then hit Return. You may need to reboot. You can tell if you have Internet by typing:
timeout 10 ping amazon.com
If you see messages such as "64 bytes received" then you are online.
You can now update the Pi Zero 2 software by typing:
cd
CubeSatSim/update
You can also login remotely from your PC if it is on the same Wi-Fi as the Pi Zero. For example, in the Terminal Window or Windows Command Prompt, you can type:
The first time you login, you will be prompted Are you sure you want to continue connecting (yes/no/[fingerprint])? Type yes then return to continue, then type the password then return. Note that the password will not be displayed as you type it.
If you don't connect your Pi Zero 2 to your Wi-Fi, you can access your Pi from a computer using just a USB cable. This Ethernet over USB service is known as RNDIS on Windows and USB Gadget on Linux.
On Mac or Linux, you don't need to install any software to use this. On Windows, you need the mDNS discovery program Bonjour. If you already have iTunes installed, you should have it. If not, you can download it from Apple here:
https://support.apple.com/kb/dl999?locale=en_US
Note that it is called Bonjour Printer Services, since that is the most common standalone use for the application. Run the installer and reboot.
On your Pi Zero 2, connect a micro USB cable to the inner micro USB connector which is labeled "USB", not the one on the edge labeled PWR IN (Power In) as shown here:
(TBD)
When you connect the other end of the USB cable to your computer, it will power up the Pi. After a few moments, you will have network connectivity to your Pi.
For example, in the Terminal Window or Windows Command Prompt, you can type:
and you can login using the default password raspberry.
Sometimes, this doesn't work on Windows - if you are unable to connect after installing the software, try the steps described here: https://fredricraab.wordpress.com/cubesat-simulators/raspberrypi-zero-windows-10-rndis- driver-problems/
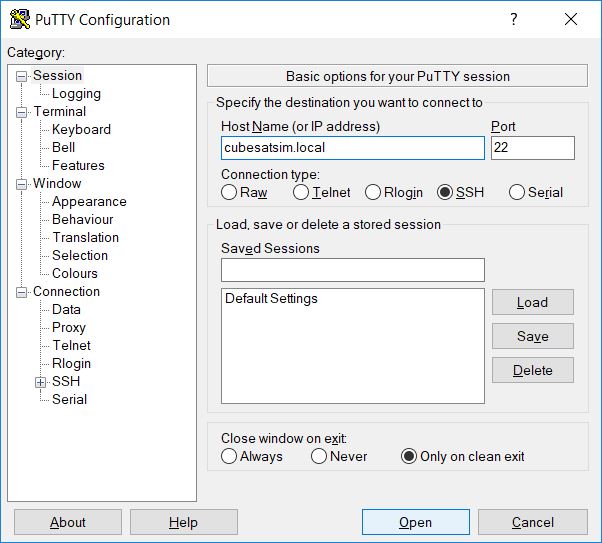
Alternatively, you can use a free application such as PuTTY on Windows. Download it here https://www.putty.org/ and open it, setting the Host Name to cubesatsim.local and then click Open to connect:
Here is how it looks when you login on Windows using PuTTY after entering the default password raspberry
You should set your amateur radio callsign which is transmitted as CW telemetry on 434.9 MHz (unless another frequency has been set using the CubeSatSim/config -F command) every time the CubeSatSim software starts up. You should edit the CubeSatSim/sim.cfg file to set your own callsign. You can also change localization settings or configure your local WiFi network by running sudo raspi-config.
The CubeSatSim software runs as a systemd service called cubesatsim.service. There is also a transmit.service which runs as well.
If you want to change the hostname from cubesatsim, you can run raspi-config by typing this command:
sudo raspi-config
You will see menu like this:
Hit the Enter key to select the System Options (or use the up and down arrows if you are on a different option). You will then see:
Use the down arrow to select Hostname then hit Enter. You will then see this message saying what characters can be used:
Hit the Enter key to continue:
Now enter your chosen hostname then hit Enter or use the down arrow to select the OK button then hit Enter.
Use the right arrow to select the Finish button then hit Enter:
Hit Enter to select Yes to reboot. When the Pi reboots in about 30 seconds, you will need to ssh using your new hostname.
You can start with the Bullseye version of Raspberry Pi OS. A Pi Zero or Pi Zero W should only run Lite while a Pi Zero 2 can run the Desktop. Make sure you create a user pi and do the install with that user or there may be issues with configuration files and settings as it references many paths in /home/pi/*. Your Pi will need to have internet access to update settings and install packages.
To get the software follow these steps:
sudo apt-get update && sudo apt-get dist-upgrade -y
sudo apt-get install -y git
git clone http://github.com/alanbjohnston/CubeSatSim.git
cd CubeSatSim
You are now ready to install the software.
./install
You will be prompted for your amateur radio callsign. If you don't have one or just hit Return, the default AMSAT will be used. The Callsign is transmitted as a CW ID (Morse code) each time the CubeSatSim software starts up.
The installation script will run for quite a while. It will prompt you if you want to modify /boot/config.txt file. Type a y and the script will complete. You will need to reboot.
These instructions are for the CubeSatSim software for the Raspberry Pi Pico processor.
You will need a Raspberry Pi Pico W (a Pico works as well but doesn't have WiFi for future features) and either a micro USB cable:

Or a USB-C cable with a micro USB adapter:

They include how to install the software, check the software log, and do various debugging.
You will need:
- Raspberry Pi Pico or Pico W microcontroller
- micro USB cable to connect to your computer
- Computer with Arduino IDE running
The simplest way is to install the software image, as described below. If you want to compile the Pico code yourself and make modifications or add sensors, Here's how to compile the code and add more sensors.
Here are the steps to install the software image:
- Download the UF2 file with the latest software from here onto your computer: Go to https://github.com/alanbjohnston/CubeSatSim/releases/ and select the latest one. In the notes for the release, you will find a link to the .UF2 file (it is also in the Assets, but you have to click on it to see it). Download the UF2 file
- While holding down the BOOTSEL button (white button on the Pico) plug your Raspberry Pi Pico or Pico W into your computer using the micro USB port
- It should mount as a flash drive called RPI-RP2. Drag the .UF2 file you downloaded previously to the Pico flash drive
- After a few seconds, the LED on the Pico should flash on and off about the once per second.
The software continuously writes a log file to the serial port. You can view it on a Computer with the Arduino IDE by running the Serial Monitor.
The board selected doesn't really matter. It could be the Raspberry Pi Pico or Pico W if you have it installed. If you don't, you could just select the Arduino Uno board.
You will need to select the Port after you plug the Pico in with the micro USB cable to your computer.
Click on the Serial Monitor icon to open it. You should set the baud rate to 115200 using the drop down menu. Here's what you will see:
Pico W detected!

Reading gyro offsets from EEPROM

-2.2400000095
-0.8700000048
-3.6099998951

Temperature calibration data from EEPROM

6.0000000000
181.0000000000

24.0000000000
169.0000000000

OK BME280 24.58 1002.06 93.57 41.64 MPU6050 2.91 -0.93 1.56 0.20 0.10 0.82 GPS 0.0000 0.0000 0.00 TMP 27.00
Squelch: 0
OK BME280 24.83 1002.10 93.27 41.44 MPU6050 2.45 -0.93 0.71 0.21 0.10 0.81 GPS 0.0000 0.0000 0.00 TMP 27.00
Squelch: 0
If you see this, you have successfully installed the CubeSatSim software on the Raspberry Pi Pico processor.
Next step is to setup your Ground Station.


