-
-
Notifications
You must be signed in to change notification settings - Fork 80
Appendix R MEBAY Controller with RS 485
The article details the setup for using genmon with a MEBAY controller with various types of RS-485 interfaces. The followinng interfaces are used:
- Direct Serial Connection using the Waveshare Rs-485 CAN HAT. This interfaces uses the built in Raspberry Pi Serial Port
- Direct Serial Connection using the Waveshare Isolated RS-485 / RS-232HAT. This interfaces uses the built in Raspberry Pi SPI port
- Direct Serial Connection using a DTECH USB to RS-485 serial converter.
- PUSR serial to WiFi converter. In this example the MEBAY controller is connected to a PUSR serial to TCP converter via RS-485. The serial to TCP converter then sends the modbus data to genmon over the local network, which in this instance is using WiFi instead of Ethernet.
The MEBAY controller settings that needs to be changed are related to the controller's RS-485 port. The CRC must be set to CRC:L_H and the modbus address must be set to to a value (do not use 1 or 255 as they may be reserved) that matches the genmon setting. In genmon you set the modbus address of the controller on the Advanced Settings page in the web interface (double click the gear icon in the upper right of the web interface to access the Advanced Settings page). The value in the in this example is 16 decimal. Genmon uses hexadecimal notation for modbus addresses so you would use a value of 10 (hexadecimal) on the Advanced Setting page.
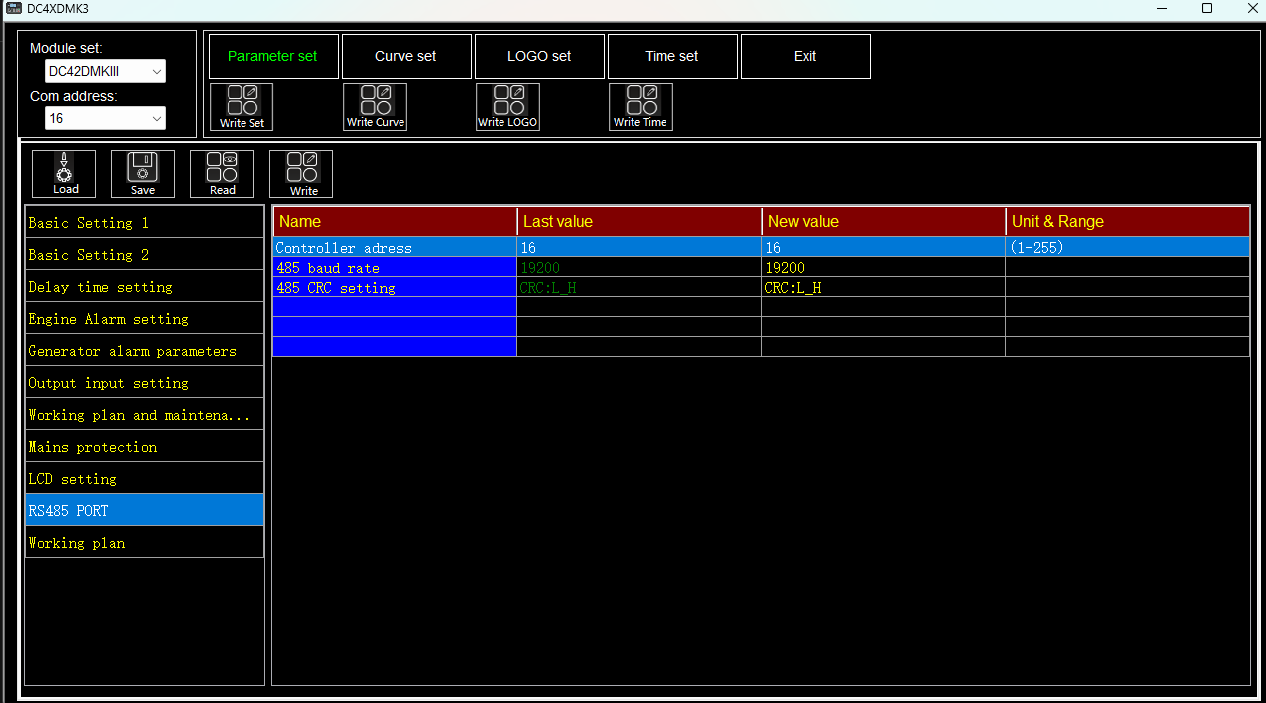
NOTE: The following connection examples can be applied to other controllers besides MEBAY however you would need to make sure the modbus address and data rate (for direct serial connections) match the settings assigned to genmon for these two parameters.
The RS-485 cable connections from the pi based HAT to the controller should look like this:
 A <---> A
 B <---> B
NOTE: No roll or crossover in the cable.
In this configuration the controller is directly connected to the Raspberry Pi via a Waveshare Rs-485 CAN HAT.
The RS-485 CAN HAT uses the built in serial port. In this instance the Raspberry Pi Zero 2 was used for testing. The genmon setup script will make the needed changes to enable the Raspberry Pi built in serial port. The HAT will provide automatic RS-485 transmitter enable / disable. The terminating resistors should be enabled via the physical switch on the HAT. The RS-485 electrical specification requires that the cable have around a 100 ohm terminating resistor on each end of the cable which is taken care of by the HAT via this physical switch on the board.
The instructions for the HAT mention the enabling of the SPI based CAN driver. Sine genmon does not use the CAN protocol this step is not needed but it is provided here for completeness.
Edit the file sudo nano /boot/config.txt or /boot/firmware/config.txt, depending on the version / distribution of the OS:
 sudo nano /boot/firmware/config.txt
 dtparam=spi=on
 dtoverlay=mcp2515-can0,oscillator=12000000,interrupt=25,spimaxfrequency=2000000
The install script for genmon creates the symbolic links for the built in serail port: /dev/ttyAMA0 - >/dev/serial0.
With the HAT connected to the conttoller you can read modbus registers with these commands:
sudo ./genenv/bin/python3 ./OtherApps/modbusdump.py -r 19200 -p /dev/ttyAMA0 -a 10 -s 4096 -e 4191
or
sudo ./genenv/bin/python3 ./OtherApps/modbusdump.py -r 19200 -p /dev/serial0 -a 10 -s 4096 -e 4191
Note that the modbusdump.py program requires that genmon not be running. Note that the modbus address (-a 10) in the above command line is 10 hexadecimal, which matches the 16 decimal in the MEBAY controller setup. Your modbus address must match in the controller and genmon setting. The serial data rate also must match the controller settings. This example uses 19200. Genmon uses 9600 by default but this can be changed on the advanced settings page.
In this configuration the controller is directly connected to the Raspberry Pi via a Waveshare Isolated RS-485 / RS-232HAT.
The Isolated RS-485 / RS-232 HAT uses the built in SPI port as a serial port.
To enable the SPI based serial port the following changes to the config.txt file are needed. Edit the file sudo nano /boot/config.txt or /boot/firmware/config.txt, depending on the version / distribution of the OS:
 sudo nano /boot/config.txt or /boot/firmware/config.txt
 sudo nano /boot/firmware/config.txt
 dtoverlay=sc16is752-spi1,int_pin=24
This creates /dev/ttySC0 RS-485 port and /dev/ttySC1 RS-232 port.
To test the RS-485 port type:
sudo ./genenv/bin/python3 ./OtherApps/modbusdump.py -r 19200 -p /dev/ttySC0 -a 10 -s 4096 -e 4191
Note that the modbusdump.py program requires that genmon not be running. Note that the modbus address (-a 10) in the above command line is 10 hexadecimal, which matches the 16 decimal in the MEBAY controller setup. Your modbus address must match in the controller and genmon setting. The serial data rate also must match the controller settings. This example uses 19200. Genmon uses 9600 by default but this can be changed on the advanced settings page.
When Using the DTECH USB to RS422 RS485 Serial Port Converter Adapter Cable, after plugging in the adapter you can test port settings Baud: 19200, Data bits: 8, Party: None, Stop bits: 1, Flow control: none
To test type:
sudo ./genenv/bin/python3 ./OtherApps/modbusdump.py -r 19200 -p /dev/ttyUSB0 -a 10 -s 4096 -e 4191
Note that the modbusdump.py program requires that genmon not be running. Note that the modbus address (-a 10) in the above command line is 10 hexadecimal, which matches the 16 decimal in the MEBAY controller setup. Your modbus address must match in the controller and genmon setting. The serial data rate also must match the controller settings. This example uses 19200. Genmon uses 9600 by default but this can be changed on the advanced settings page.
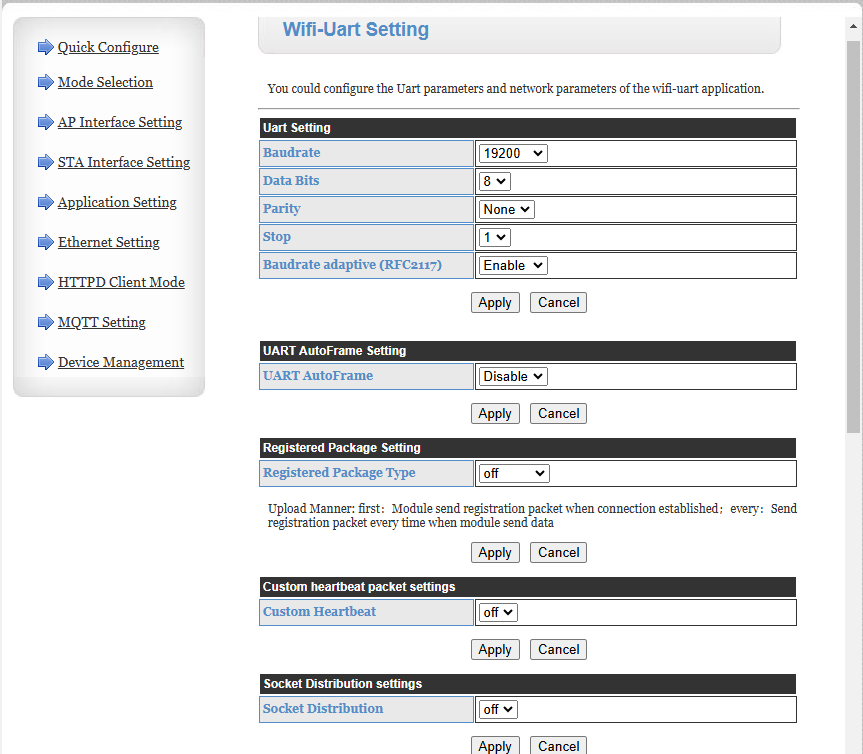
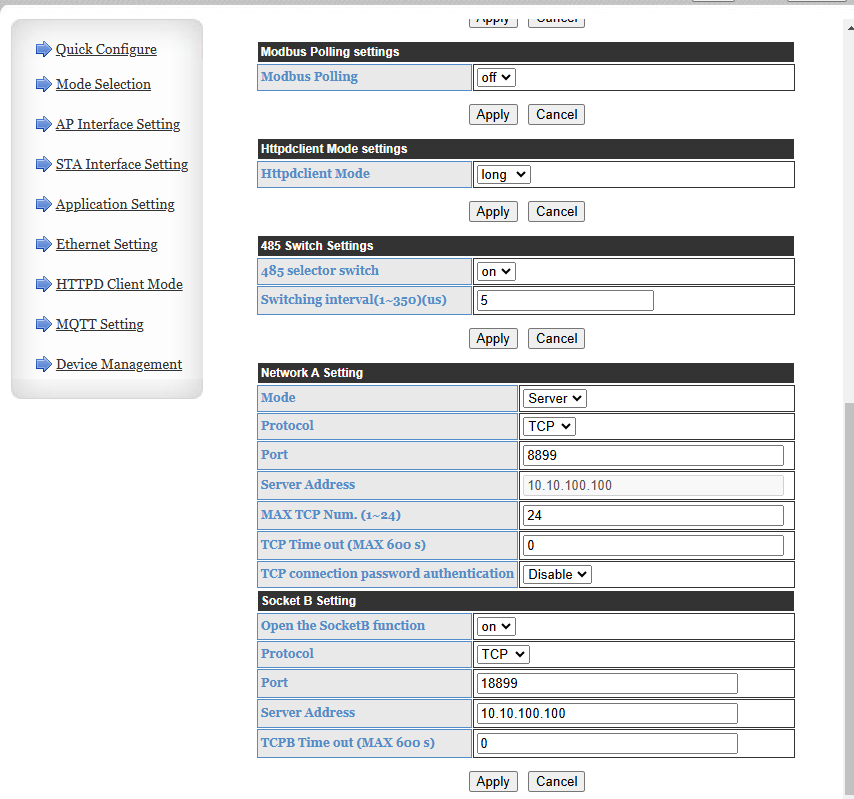
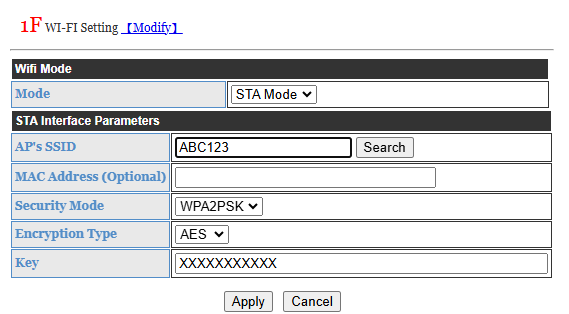
When using a serial to TCP converter the setup will vary depending on the model converter used. Below are settings for the PUSR USR-W610 and the Waveshare RS232/485 to WfFi / Ethernet.
NOTE: The PUSR USR-W610 and Waveshare RS232/485 TO WIFI ETH setup web pages look the same, likely because the are made by the same manufacture.
The following are screenshots of the Serial to TCP converters:
Application Settings 1:
Application Settings 2:
Mode Selection:

STA Interface Settings:
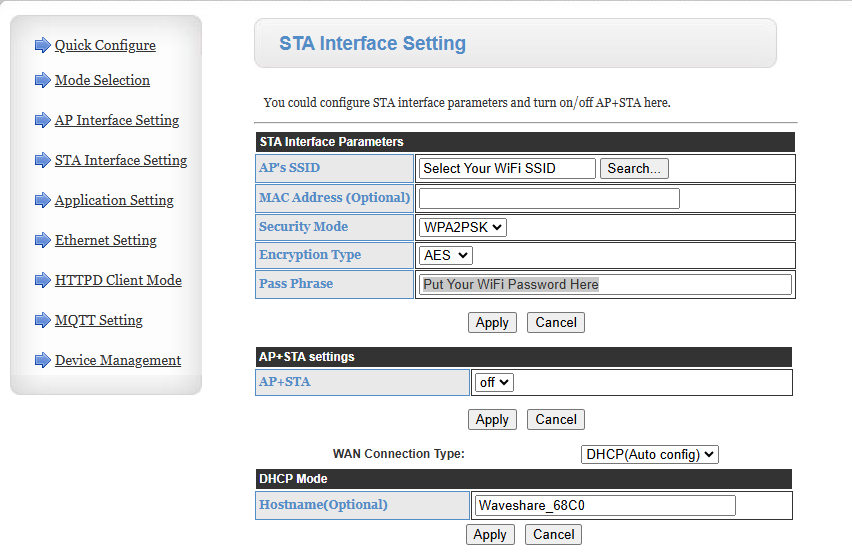
WiFi Settings for STA Mode:
Command used to test:
sudo ./genenv/bin/python3 ./OtherApps/modbusdump.py -i 192.168.1.143 -t 8899 -a 10 -s 4096 -e 4195
NOTE: Note that the modbusdump.py program requires that genmon not be running. Note that the modbus address (-a 10) in the above command line is 10 hexadecimal, which matches the 16 decimal in the MEBAY controller setup. Your modbus address must match in the controller and genmon setting. The IP address and port number must match the serial to TCP converter settings. The IP and port number must also match the genmon settings on the Setting page in the web interface.